Blog, Hair style
A Step-By-Step Guide On How To Do Hair Twists In Minutes
Have you ever wanted to create unique and trendy twisted hair? Hair twists are not only aesthetically pleasing but are also a great way to protect your hair. Here, we’ll explore the guide on how to do hair twists step by step. From simple two-strand twists to more intricate styles, we’ll cover it all. Get ready to learn how to create beautiful twists and discover unique styling tips to keep your hair perfect. Let’s get started!

What Types Of Twist Are There?
Before diving into the guide on how to do twists, it’s essential you should know the types of hair twists. There are several types of hair twists, each offering a unique style and appearance. Explore these options to find the twist style that suits your preferences and complements your natural hair.

1. Finger Twists
Finger twists involve winding one section of hair around itself in its natural direction. These are often done on damp hair and can be worn as they are or separated into smaller curls once dry.
2. Two-Strand Twists
This technique involves taking two sections of hair and continuously wrapping them around each other until the ends. You can adjust the tightness and thickness of these twists to your preference.
- Nubian Twists: Made with short synthetic kinky hair for a springy look.
- Havana Twists: Usually chunky and long.
- Senegalese Twists: Use Kanekelon hair for a smooth appearance.
- Marley Twists: Similar to Havana twists but use lighter and more springy faux hair.
3. Flat Twists
Similar to two-strand twists but kept close to the scalp, with small sections of hair picked up as you go, akin to French plaits or cornrows.
4. Three-Strand Twists
Unlike braids, three-strand twists involve taking three strands of hair, each twisted in one direction, and twisting them together using a different technique.
How To Do Twists On Natural Hair With Finger Twists
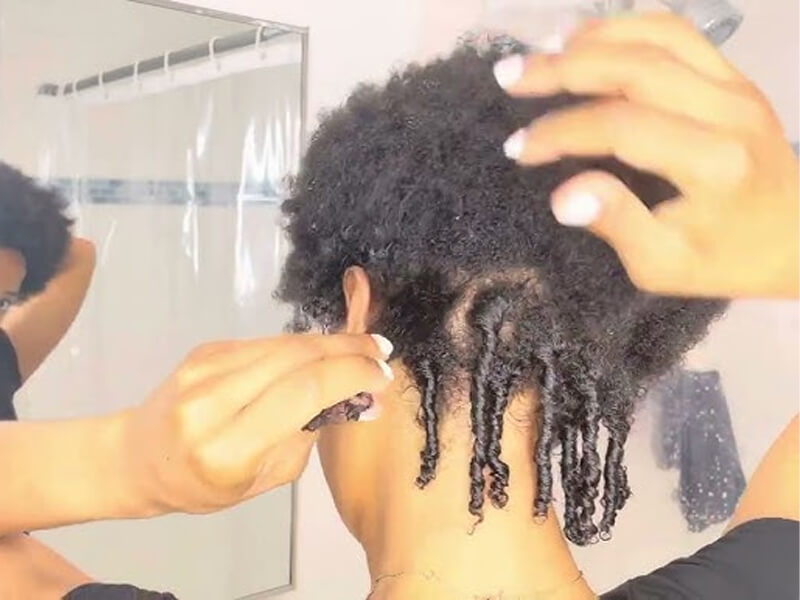
Finger twists are a simple yet elegant hairstyle that can be worn for various occasions. Follow these steps to achieve finger twists:
- Step 1: Start with freshly washed and conditioned hair. Then use a wide-tooth comb or your fingers to gently detangle your hair, starting from the tips and working your way up to the roots.
- Step 2: Apply a water-based leave-in conditioner or a moisturizing hair product throughout your hair. This step helps keep your hair hydrated, making it more pliable for twisting.
- Step 3: Divide your hair into sections based on your desired twist size. Smaller sections create smaller twists, while larger sections result in chunkier twists. Use hair clips or bands to secure the rest of your hair out of the way.
- Step 4: Take a small section of hair from one of the parted sections. The size of the section will determine the thickness of your twists.
- Step 5: Hold the selected section in your dominant hand and twist it around itself in the direction that your hair naturally turns. Continue twisting until you reach the ends of the hair.
- Step 6: Continue these steps for each section of your hair until all your hair is twisted. Make sure the twists are uniform in size and tightness for a neat appearance.
- Step 7: Once your twists are dry, you can style them as desired. You can leave them as finger twists, pin them up for an updo, or unravel them for a twist-out look.
How To Do Two Strand Twists
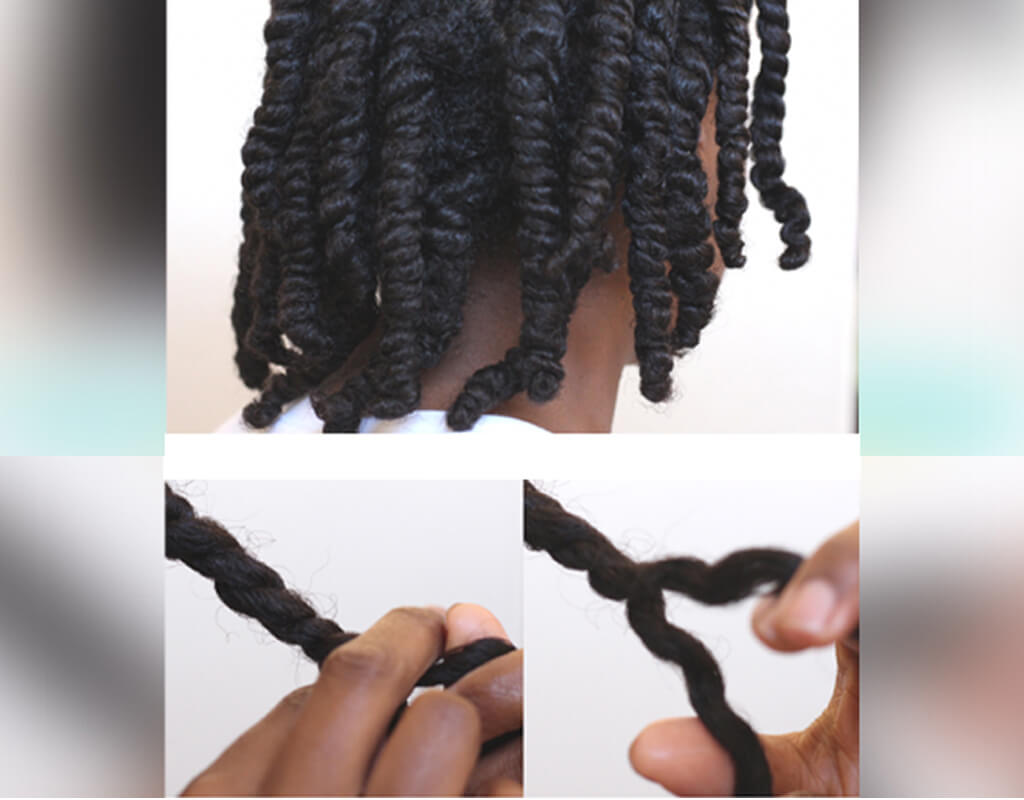
Two-strand twists are a popular and stylish hairstyle that can create textured, curly, or wavy hair without using heat or chemicals. Here’s a step-by-step guide on how to do two strand twists:
- Step 1: Dry your hair with a soft towel to remove excess water, but keep your hair damp. If your hair starts to dry out during the styling process, you can spray it with water to keep it moist.
- Step 2: Use a wide-tooth comb or your fingers to divide your hair into small sections. The size of these sections will determine the size of the twisted hair.
- Step 3: Take a small amount of leave-in conditioner and apply it to each section of hair. This will help retain moisture in your hair and make the twisting process easier.
- Step 4: Take a small section of hair and divide it into two equal parts. Twist these two parts around each other like twisting a rope. Continue twisting until you reach the end of the strand, then secure the twisted strand with a hair clip or small hair band. Repeat this process for each section of hair.
- Step 5: Let twisted hair dry naturally. This process can take a few hours or overnight, depending on your hair type and the size of the twists.
- Step 6: Once your hair is completely dry, remove the hair clip or hair clip from the twisted strands.
- Step 7: Gently separate and fluff twisted strands with your fingers to create the desired volume and texture.
Upgrade With A Three-Strand Twist
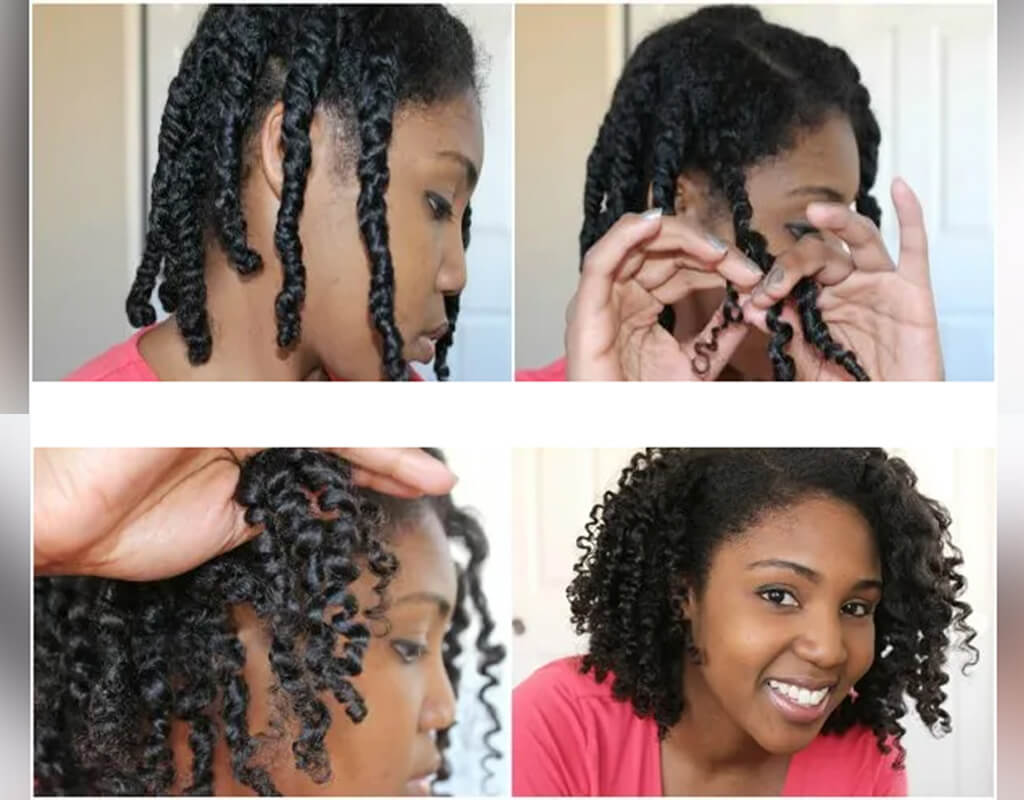
A more advanced twist style that’s still achievable is the three-strand twist. While it may seem a bit challenging initially, it becomes easier with practice.
Here’s how to do hair twists using three-strand twists method:
- Step 1: Divide your hair into three evenly sized sections, just as you would for a braid.
- Step 2: Hold these sections flat and side-by-side.
- Step 3: Take the strand closest to your neck and cross it over the other two strands, making it the one furthest from your neck.
- Step 4: Next, repeat this step with the section of hair that was initially in the middle but is now closest to your neck.
- Step 5: Continue this process all the way to the ends of your hair.
How To Do Twists By Using Flat Twists
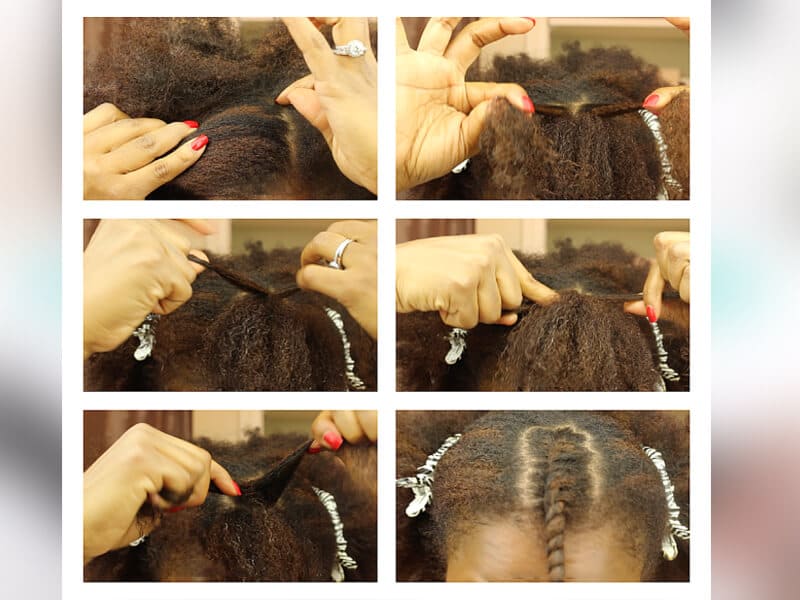
Flat twists are a popular hairstyling technique that creates a sleek and elegant look. Here are steps on how to do hair twists using this method:
- Step 1: After cleansing your hair and applying moisturizer, divide your hair into sections based on your desired twist size.
- Step 2: Similar to the two strand twists method, choose a small section of hair from one of the divided sections as your starting point. Divide this into two equal parts.
- Step 3: Hold the two sections closely together and begin twisting them around each other, picking up a small section of hair from the scalp with each twist. This creates a flat, braided appearance close to the scalp.
- Step 4: As you continue flat twisting, keep the tension even and close to the scalp. Pick up small sections of hair along the way to maintain the flat appearance.
- Step 5: Once you’ve reached the end of the twist, secure it with a hairband or clip to prevent unraveling.
- Step 6: Repeat the Process. Continue these steps for each section of your hair until all your hair is flat twisted.
Can You Twist Short Hair?
So, may you wonder “Can short hair be twisted? or “How to do twists on short hair? You can totally use the same twisting techniques for short hair as you would for long hair. But, if your hair is very short, it may be easier to opt for one or two-strand twists rather than three-strand twists. If you’re interested in twist styles that involve hair extensions, it’s a good idea to consult a professional stylist for the best results.
To explore a wide range of high-quality real hair extensions perfect for achieving stunning twists and textured hairstyles, be sure to visit our bulk hair extensions, our trusted online store, Apohair has the reputable Vietnam hair factory, known for its premium hair products.
How To Maintain Hair Twists

To keep your mini twists looking their best and maintain healthy hair, follow these essential tips:
- Twist Duration: It’s advisable to keep your mini twists in for a maximum of four weeks. This timeframe helps prevent damage and tangling.
- Protective Bedtime: Before bed, always wear a satin scarf or use a satin pillowcase. This protects your mini twists, prevents moisture loss, and reduces friction as you sleep.
- Scalp Care: To avoid odor from prolonged wear, regularly massage your scalp with oil. You can also use a cleansing shampoo to wash your scalp while keeping the twists intact.
- Moisturize: Keep your mini twists well-moisturized. Fill a spray bottle with a water and leave-in conditioner mixture, then spritz your twists from roots to ends. Follow this by applying a lightweight oil to seal in the moisture.
- Hands Off: Minimize touching your hair as much as possible to prevent frizz. Keeping your hands away helps maintain the neat appearance of your twists.
- Retwisting: After four to five days, re-twist any unraveling twists using your favorite hair cream or oil. This prevents the twists from loosening up to the roots. Finish by sealing the ends with a bit of gel.
Final Thoughts
Now you’ve got in hand the guide on how to do hair twists. It’s really stylish and easy to make. Hair twists are a great way to get stunning, textured hairstyles without heat or chemicals. With the right preparation, the right tools, and good technique, you can create beautiful twists that suit your style. So get ready to rock those amazing twists and embrace your natural beauty with confidence!
And finally, for the best results, don’t forget to incorporate high-quality hair extensions from Apohair – the leading wholesale hair vendors in Vietnam. If you’re on the lookout for wholesale hair, feel free to contact us for the best factory-direct prices.
Next article: How to Braid Cornrows – A Step-by-Step Guide

