








20 Hairstyles That Keep Hair Out of Your Face, From Braids to Half-Up Styles
Hairstyles that keep hair out of your face either gather the full length, secure the top section, or redirect the short front pieces with braids, twists, pins, clips, bands, or styling products. The right method depends on your hair length, texture, activity, and how long the style needs to stay in place. A French braid or braided ponytail withstands running and sports, while a claw-clip half-up or pinned twist feels more comfortable through a desk day.
This guide covers 20 easy hairstyles across four groups: fully pulled-back styles, half-up looks, hairstyles that keep the length down, and options for short hair or growing-out bangs. Each entry explains the required length, suitable textures, styling method, best use, and the mistake most likely to loosen it.
Fully Pulled-Back Hairstyles That Keep Every Strand Off Your Face
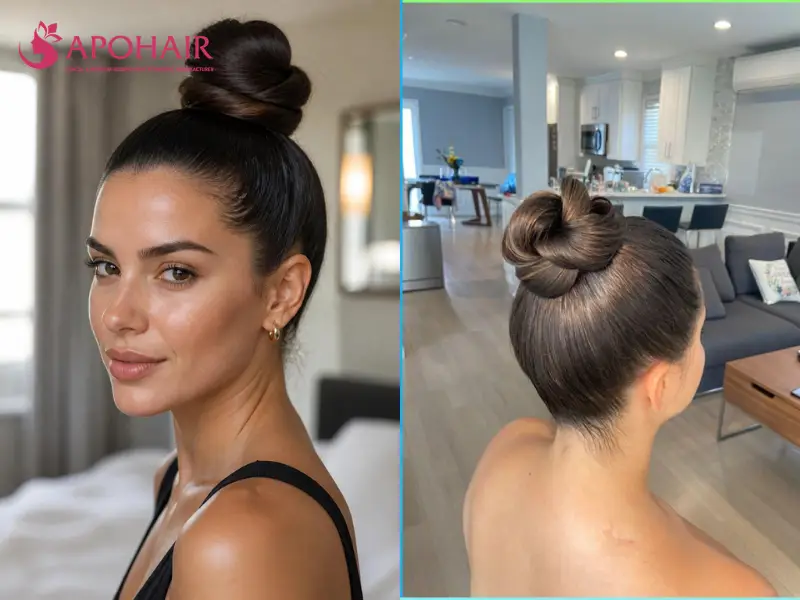
Fully pulled-back styles anchor all the hair at one point or two. A slicked-back high ponytail sits at the crown and a low bun at the nape. A braided crown circles the head, a twisted top knot coils on top, a French braid runs down the middle, and sleek low braided pigtails split the weight in half. Nothing falls forward when the head tips down, which separates this group from every other.
1. Slicked-Back High Ponytail
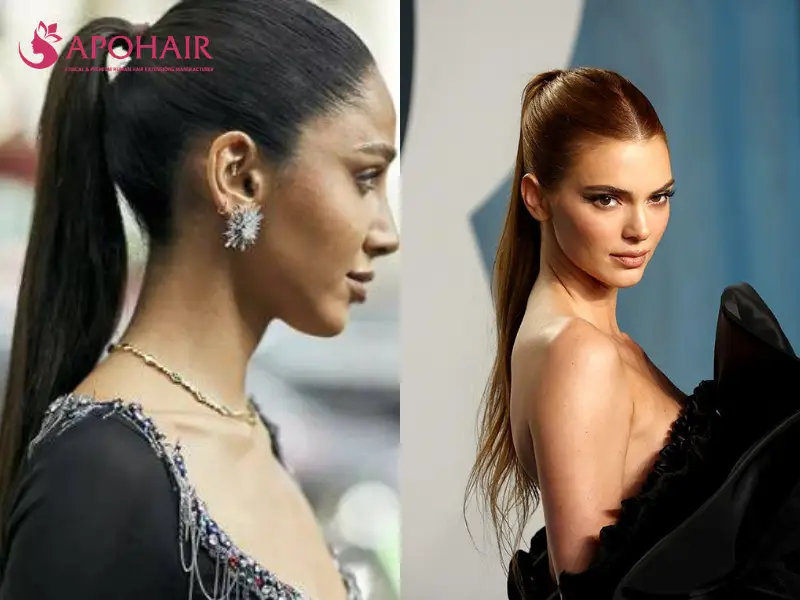
A slicked-back high ponytail gathers every section, hairline and nape included, into one elastic at the crown. The anchor sits above the ear line, so gravity pulls the hair backward and no strand reaches the cheeks when the head bends over a keyboard. Hair needs to clear the shoulders for the tail to hang. Type 1 and Type 2 hair slips against a bare elastic and needs gel, while Type 3 and Type 4 coils grip on their own. It suits workouts, kitchens, and long screen days.
A brush loaded with gel smooths the hair from the hairline back, a quarter of the head at a time, before a snag-free elastic closes the tail. A second elastic halfway down stops a heavy tail swinging. Temple strands dry fastest and slip first, so a comb reworks them last. The crown carries the whole weight, so the anchor shifts slightly between wears. A daily tight ponytail in one spot is the pattern the American Academy of Dermatology links to traction alopecia.
2. Low Bun at the Nape
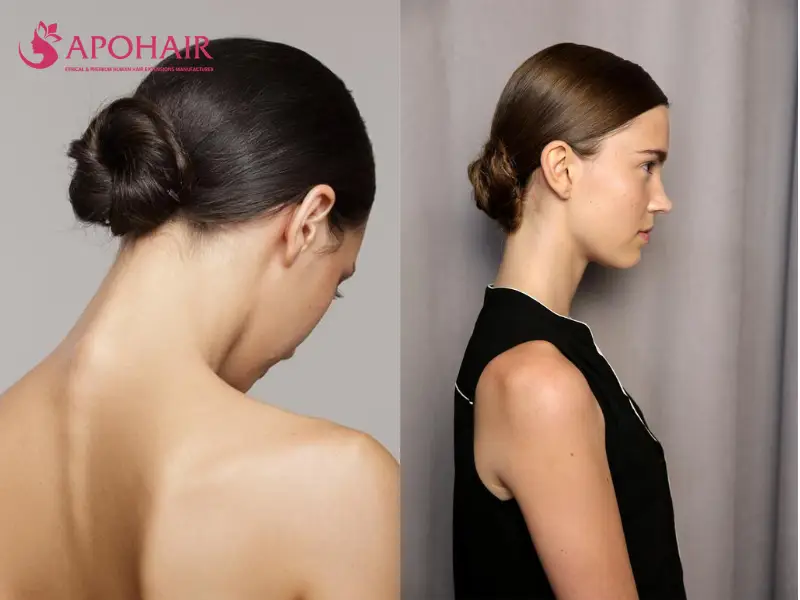
A low bun at the nape coils the whole length into a knot below the occipital bone, where the skull curves into the neck. This anchor sits lowest of any full updo, so the pull runs downward and nothing drags the front hair toward the face. Hair past the collarbone wraps into a full coil, while shoulder-length hair makes a smaller knot. Fine Type 1 hair needs a hidden tie under the coil, and thick Type 3 or Type 4 hair holds with pins alone. It suits offices and formal events.
The hair gathers at the nape, twists in one direction until it wants to spiral, then wraps around its own base. Two U-shaped pins cross through the coil, and a third anchors the tail end. A low bun rests against collars all day, so the pins point downward rather than outward. Lower anchors spread tension better than crown anchors, which suits repeat wear. A common mistake is twisting so tightly that the coil kinks, because a kinked coil unwinds within the hour.
3. Braided Crown
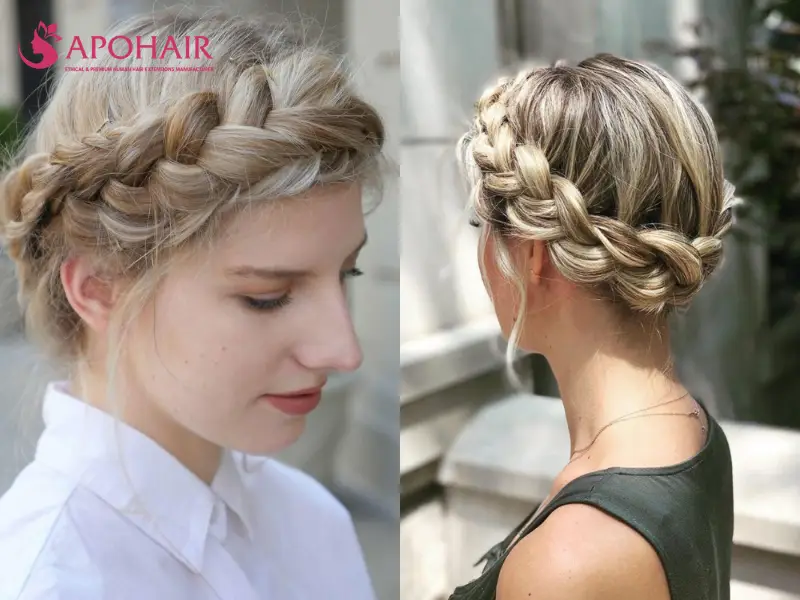
A braided crown, also called a halo braid, runs one continuous braid around the head above the ears and pins the tail into the start. The braid becomes the anchor, so the front hairline is covered by hair already locked into a structure and nothing falls toward the face. Hair needs to reach the shoulders to travel the full circle. Type 2 to Type 4 textures hold the braid cleanly, while fine hair needs texture spray first. It suits weddings, heat, and travel.
Each side braids from the temple back toward the nape, picking up sections along the hairline as it moves. The two braids meet at the back, cross over each other, and pin flat against the opposite side. Pins enter against the braid direction so they lock rather than slide. Pickups start a finger’s width back from the edge, since hair taken right at the hairline pulls the finest strands. A common mistake is braiding loosely at the temples, where the finished circle drags the slack forward.
4. Twisted Top Knot
A twisted top knot gathers the hair at the crown, twists the length into a rope, and coils that rope into a knot that holds itself. The twist does the work, since a rope under tension locks against its own turns and keeps every front strand off the forehead. Hair from chin length upward twists, though a full knot needs collarbone length. Type 3 and Type 4 hair grips well, and Type 1 hair needs a base elastic. It suits humid weather, cooking, and hands-on work.
The section twists in one direction until the rope coils on its own, then wraps around its base in that same direction. Reversing direction at the wrap loses the knot fastest. A claw clip or two crossed pins secure the tail underneath. The crown position means every head movement tugs the same roots, so the knot sits looser than it could. A common mistake is twisting only the ends, which produces a rope that unwinds from the root outward.
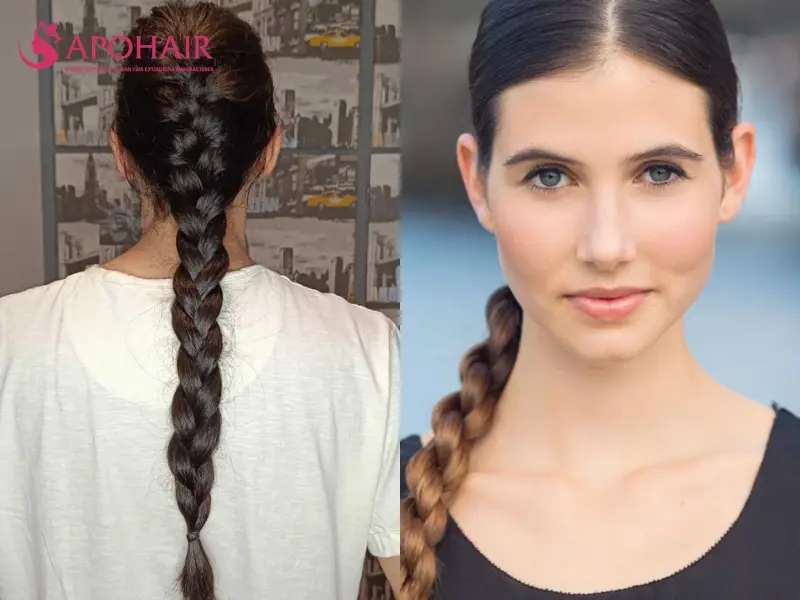
5. French Braid Straight Back
A French braid straight back starts at the front hairline and picks up new hair from both sides as it travels down the middle of the head. Every section joins the braid where it grows, so nothing is left loose to fall toward the face, including the short temple pieces that escape a ponytail. Hair needs about four inches at the front for the first crossings. All textures braid, and Type 4 hair holds the pattern longest. It suits sports, sleep, and multi-day wear.
Three equal sections at the hairline cross once, and every crossing after that adds a ribbon of hair from the side. Even pickups keep the braid straight, while uneven ones pull it off the middle within a few crossings. Tension stays consistent rather than tight, since the first crossings sit on the finest hairline strands. A braid worn overnight loosens by morning, which helps the scalp. A common mistake is starting with sections that are too large, which leaves gaps the loose hair falls through.
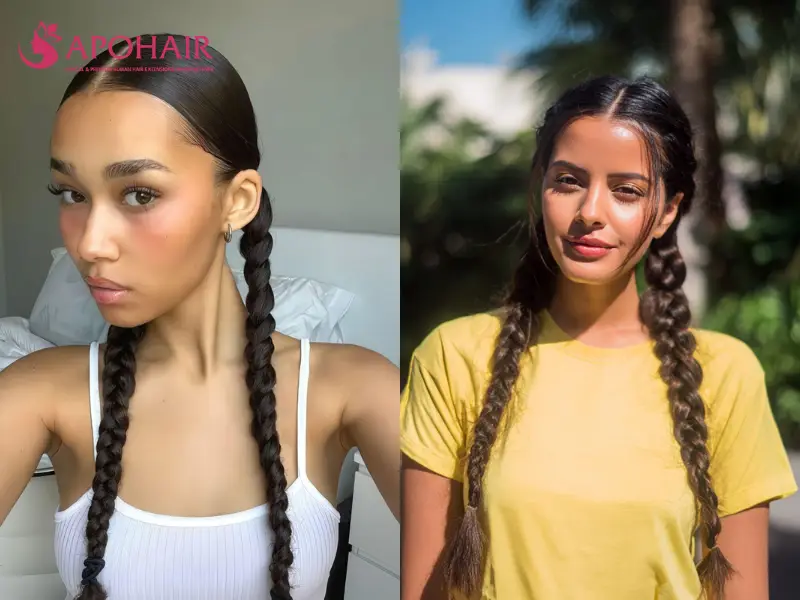
6. Sleek Low Braided Pigtails
Sleek low braided pigtails split the hair down a middle part and braid each half from below the ear. The weight divides between two anchors at the back of the neck. No single point carries the whole head, and the divided sections hold the temple hair flat instead of letting it swing toward the face. Hair needs to clear the shoulders. Type 1 and Type 2 hair reads sleekest with gel, while Type 3 and Type 4 hair gives the braids more body. It suits travel, sleep, and long shifts.
A rat-tail comb sets the part first, since a crooked one shows on both sides at once. Each half smooths with cream to the ear, braids from just below it, and closes with a small elastic. Starting below the ear rather than at the temple keeps tension off the hairline. Both braids sit against the neck, so they survive a pillow without flattening. A common mistake is braiding one side tighter, which drags the part off true and lets the loose side slip.
Half-Up Hairstyles That Keep the Front Clear
Half-up styles lift only the top section. The group runs from a half-up top knot and a half-up ponytail with twisted sides to a claw-clip half-up. A bubble half-up divides the section with elastics, and half-up Dutch braids feed into a ponytail. The lower half stays visible, so the length still shows while the front stays clear, which is the trade-off this group exists for.
7. Half-Up Top Knot
A half-up top knot takes the section between the temples and the crown, twists it into a small knot, and leaves everything below hanging. That section is exactly the hair that falls forward over the eyes, so clearing it solves the problem without committing the whole head. Chin length upward has enough to knot. All textures work, though Type 1 hair needs an elastic under the knot to stop it sliding. It suits casual days, video calls, and growing-out layers.
The section runs from the outer corner of each eyebrow back to the crown, the natural boundary where hair starts falling forward. It twists, coils into a small knot, and holds with a clear elastic or two pins. Only a small weight hangs from these roots, so tension stays mild in repeat wear. A common mistake is taking a section so wide that it lifts the side hair and exposes the ears, which changes the whole silhouette.
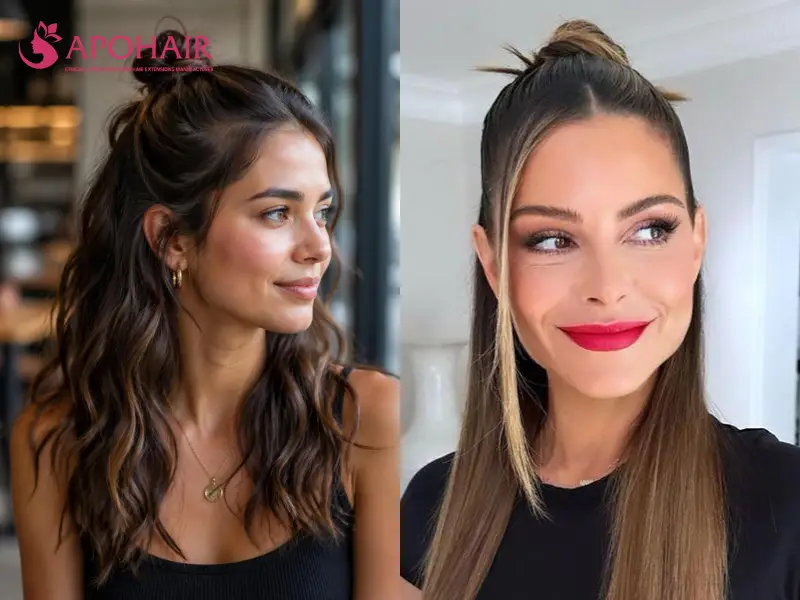
8. Half-Up Ponytail With Twisted Sides
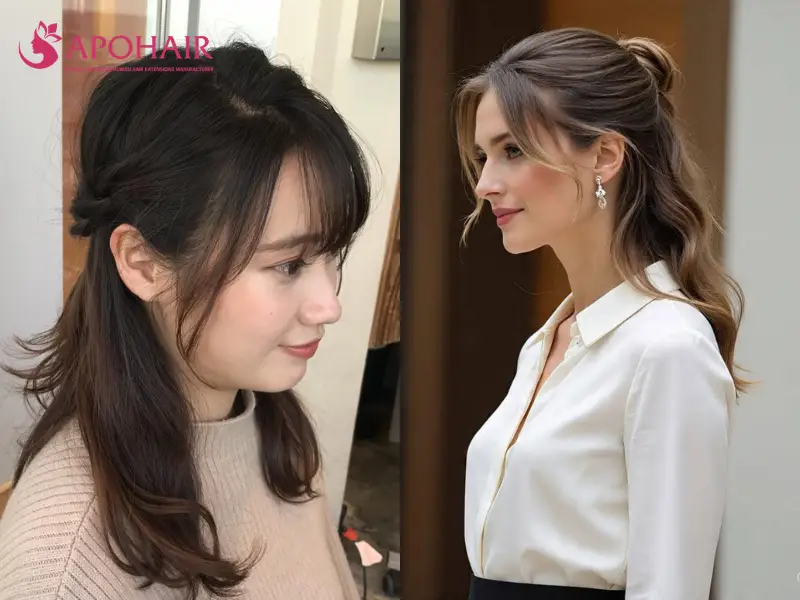
A half-up ponytail with twisted sides rolls the hair above each ear backward into two twists, joins them at the back, and ties them into a small ponytail. The twists lock the side pieces that normally slip out of a plain half-up, so the hair around the face stays clear all day. Hair needs to pass the chin for the twists to reach the back. Type 2 and Type 3 hair holds a twist best, and very straight hair needs texture spray. It suits offices and dinners.
Each side takes hair from the temple to behind the ear, twists away from the face, and pins temporarily at the back. The two twists meet, cross once, and close into one elastic. Twisting away from the face keeps the pattern visible from the front. The anchor sits mid-back, so the pull spreads across two starting points. A common mistake is twisting all the way to the ends, which leaves no slack and pops the twists loose as the head turns.
9. Claw-Clip Half-Up
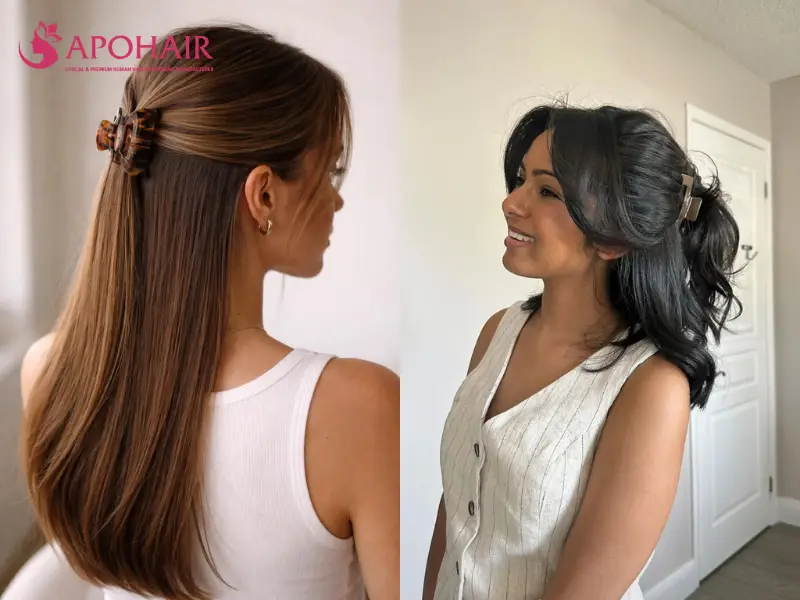
A claw-clip half-up gathers the top section and clamps it against the back of the head with a hinged clip instead of an elastic. The clip grips a folded section, so tension spreads across its full width while the front hair stays off the cheeks. Hair needs to reach the shoulders for the clip to have something to fold. Thick Type 3 and Type 4 hair needs deep teeth, while fine hair holds in a medium clip. It suits headaches and fast restyles.
The top section gathers as if for a half-up ponytail, twists a half turn, and folds against the head before the clip closes over the fold. That half twist gives the clip something thick to bite. A clip sized to the hair prevents the slow slide that ends with it hanging loose. Clips spread pressure widely, which makes them the gentlest anchor for daily wear. A common mistake is clamping onto smooth, product-free hair, where it slides within minutes.
10. Bubble Half-Up
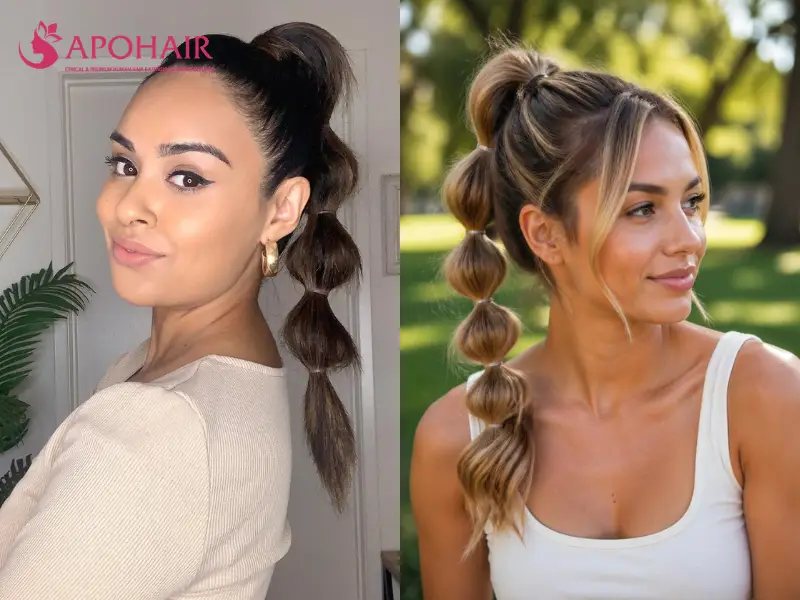
A bubble half-up ties the gathered top section at intervals down its length, and the hair puffs between each elastic into rounded segments. The repeated ties hold the front hair under control far below the first anchor, so movement that loosens a single tie leaves this one intact. Hair needs to pass the shoulders for two bubbles to form. All textures work, and Type 3 or Type 4 hair gives the fullest shape. It suits parties, photos, and long events.
The first elastic sits at the half-up point, and the rest go in every two to three inches. Fingers pull each segment outward to round it before the next elastic goes on, since rounding after the next tie flattens it again. The elastics sit along the length rather than at the scalp, so little tension reaches the roots. A common mistake is spacing them unevenly, which makes the bubbles read as accidental rather than as a pattern.
11. Half-Up Dutch Braids Into a Ponytail
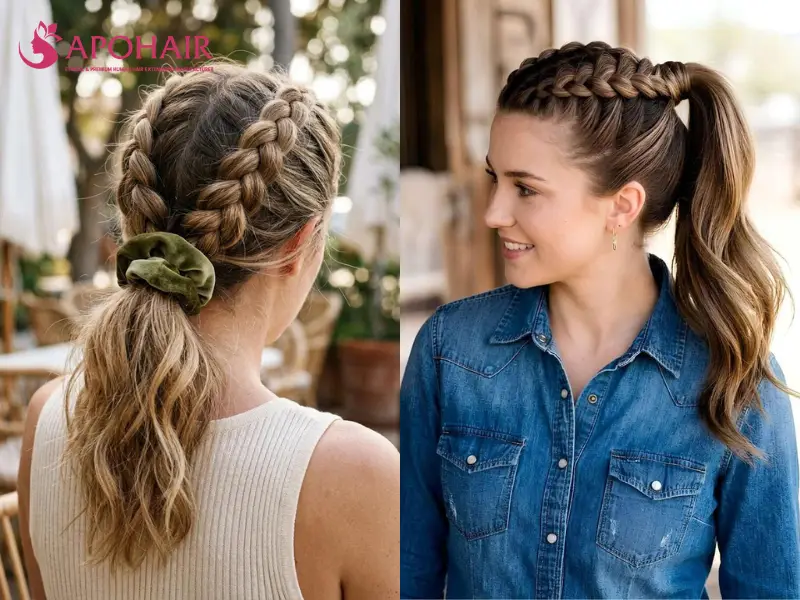
Half-up Dutch braids into a ponytail run two raised braids along either side of the top of the head and gather them into one tail at the back. A Dutch braid crosses its sections underneath, so it sits proud of the scalp and traps every short strand along the front hairline as it travels. Hair needs about four inches at the front. Type 1 and Type 2 hair benefits most, since the braid grips strands that slide out of twists. It suits sports and humid days.
A middle part divides the top, and each side braids from the front hairline backward, crossing sections underneath and picking up hair along the way. The braids stop at the crown, where one elastic collects both. Shallow pickups keep the braid raised, while deep ones flatten it into a French braid. Two braids share the load, so neither hairline carries much. A common mistake is letting the braids drift together at the back, which exposes the part.
How to Keep Your Hair Out of Your Face Without Putting It Up
These styles never gather the hair at all. A deep side part pins the front back and twisted front sections pin at the crown. A pushed-back blowout lifts the root, and a headband tuck holds the front under fabric. Each one redirects the front pieces and leaves the full length hanging, which suits anyone who wants the hair visible rather than tied up.
12. Deep Side Part With Pinned Back Front
A deep side part with the front pinned back moves the parting well past the middle. The heavier side sweeps across the forehead and pins behind the opposite ear. The part does most of the work, since hair falls the way it is parted and the pin only holds what gravity already carries off the face. Hair needs to reach the jaw to travel far enough to pin. Type 1 and Type 2 hair sweeps smoothly, while Type 3 and Type 4 hair needs cream. It suits evenings and interviews.
The part goes in on wet hair, since a damp part holds its direction all day. The heavy side dries with a brush pulling it across and back, then two pins cross in an X behind the ear. Crossed pins hold far better than two parallel ones. Little hair sits under tension, so the style stays comfortable through long wear. A common mistake is pinning the sweep too high, which creates a bulge and drops the section by afternoon.
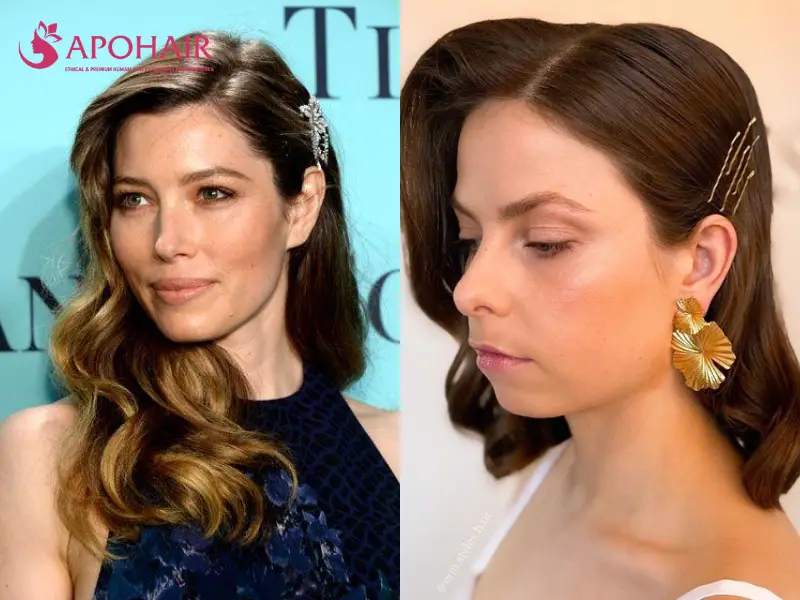
13. Twisted Front Sections Pinned at the Crown
Twisted front sections pinned at the crown take a piece from each side of the face and twist them backward. Both pin at the top of the head while the rest hangs free. The twist shortens each front piece as it turns, lifting it off the cheek without losing length from the overall look. Hair needs to pass the chin to reach the crown. All textures work, and Type 3 or Type 4 hair holds a twist without product. It suits dates and growing-out lengths.
Each front section runs from the part to above the ear, twists backward two or three turns, and pins at the crown against the direction of the twist. A third pin underneath takes strain off the visible two. Twists that stop at the crown leave the loose length undisturbed. Tension stays low, since each twist holds a narrow ribbon. A common mistake is twisting toward the face instead of away, which pushes the sections forward again as they loosen.
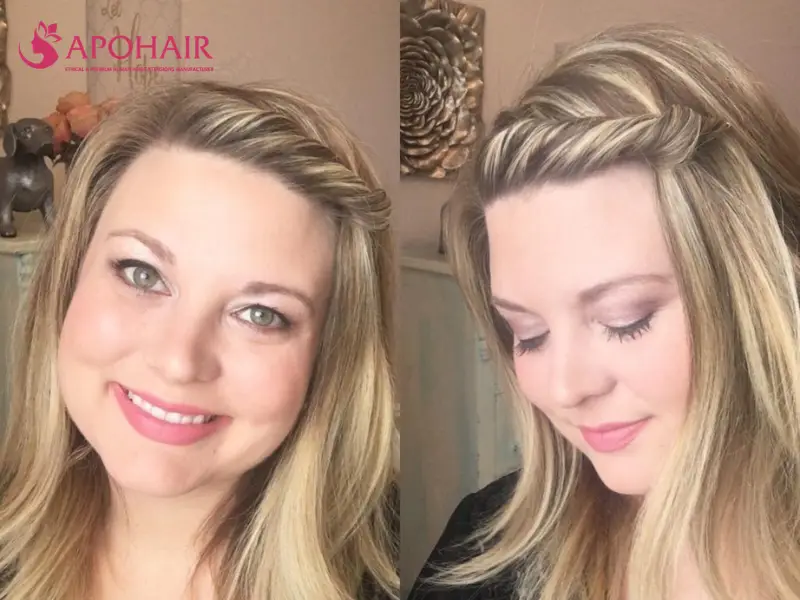
14. Pushed-Back Blowout With Volume at the Root
A pushed-back blowout dries the hair with the roots lifted and aimed away from the hairline, so the front sections stand back off the forehead on their own. Root direction sets while the hair dries, so the style holds with no pin, elastic, or clip at all. Chin length upward takes the shape. Type 1 and Type 2 hair holds a blowout for days, while Type 3 and Type 4 hair needs smoothing cream and a brush attachment. It suits presentations and photos.
Damp hair takes volume mousse at the roots, then dries in sections with a round brush rolling the hair up and back. Cool air at the end of each section sets the root where the brush left it. Hair dried downward falls forward no matter what product follows. Nothing pulls on the scalp, which makes this the lowest-tension option for daily wear. A common mistake is aiming the dryer down the hair shaft, which flattens the root and cancels the lift.
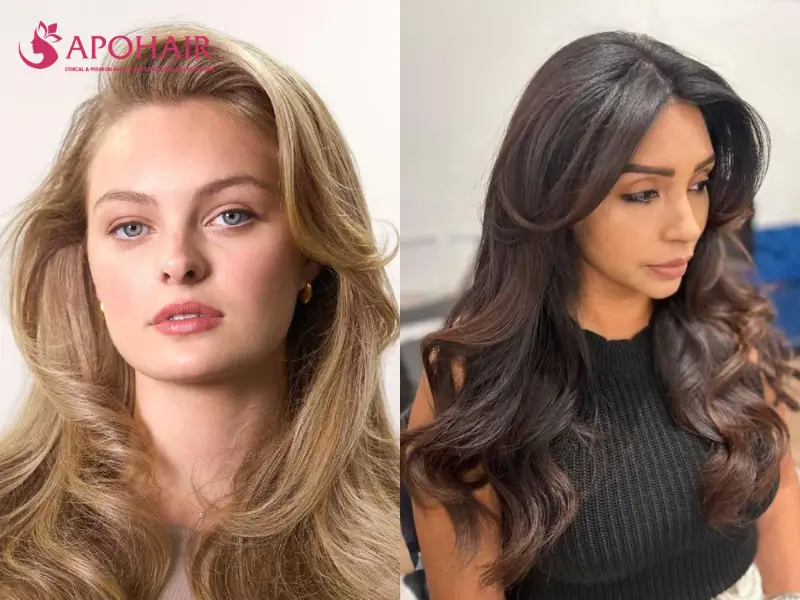
15. Headband Tuck
A headband tuck slides a wide fabric or padded band over the head from front to back. The front sections tuck up under the band while the length stays loose. The band traps hair along a line behind the hairline, holding everything in front of it without pulling from the roots. Any length past the ears works, including grown-out layers. All textures suit it, Type 4 hair especially, since it adds no tension to the edges. It suits sleep, cleaning, and exercise.
The band goes on over dry hair, and the front pieces tuck backward under its edge one section at a time. Gripper strips hold on smooth hair, while plain satin slides unless the hair has texture. Tucking sections rather than dragging the whole front back keeps the hairline flat. The band spreads grip across several inches of scalp, which suits fragile edges. A common mistake is a tight elastic seam, which presses one line into the scalp and leaves a headache.
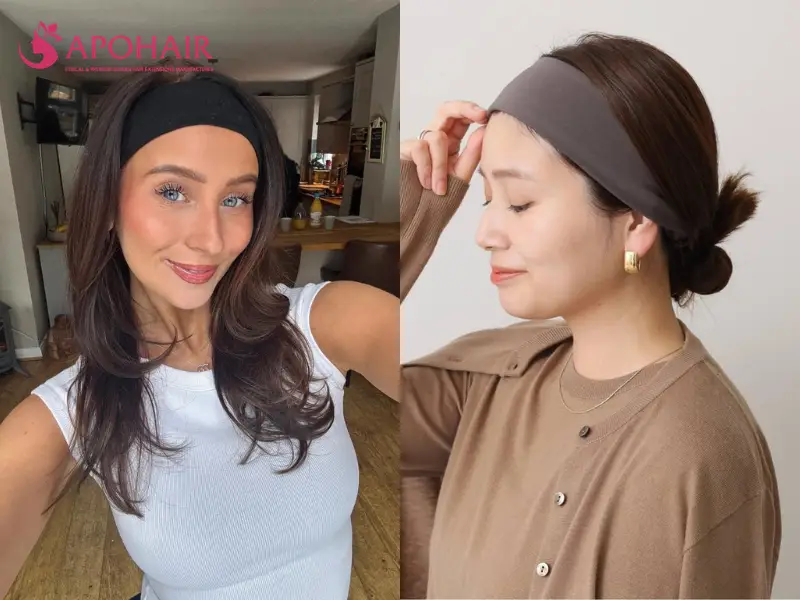
Hairstyles That Keep Short Hair and Bangs Out of Your Face
Short hair and grown-out bangs cannot reach an elastic, so they need a different anchor. Bobby pins hold the bangs back and mini twists grip at the temples. A bandana ties across the head, two French braids work close to the scalp, and a slicked-back bob sets with gel. Every style in this group anchors hair too short to gather.
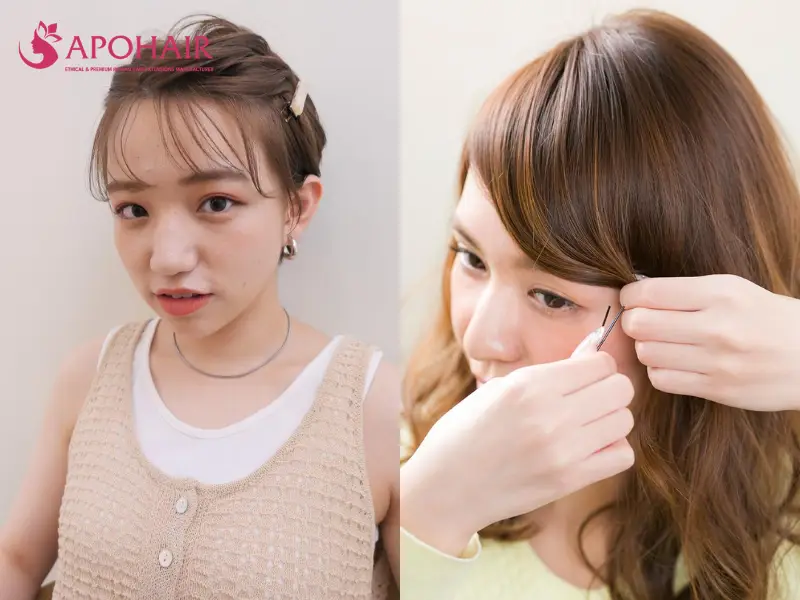
16. Pinned-Back Bangs With Bobby Pins
Pinned-back bangs use two or more bobby pins to hold the fringe flat against the side of the head, clearing the eyes while the bangs grow out. Pins grip a short section at the scalp, the only anchor available when the front hair cannot reach a tie. Bangs need about three inches to fold back and stay pinned. Fine Type 1 hair needs a ridged pin against the scalp, while thicker hair holds any pin. It suits the growing-out phase and exercise.
The fringe sweeps to one side, folds back on itself once, and pins at the fold so the pin catches both layers. Pins go in with the wavy side against the scalp, since that side grips. A mist of hairspray on the pin doubles its hold on slippery hair. Pins shifted slightly between wears stop a line of stress building in one spot. A common mistake is pinning without the fold, which leaves one thin layer and lets the pin slide out.
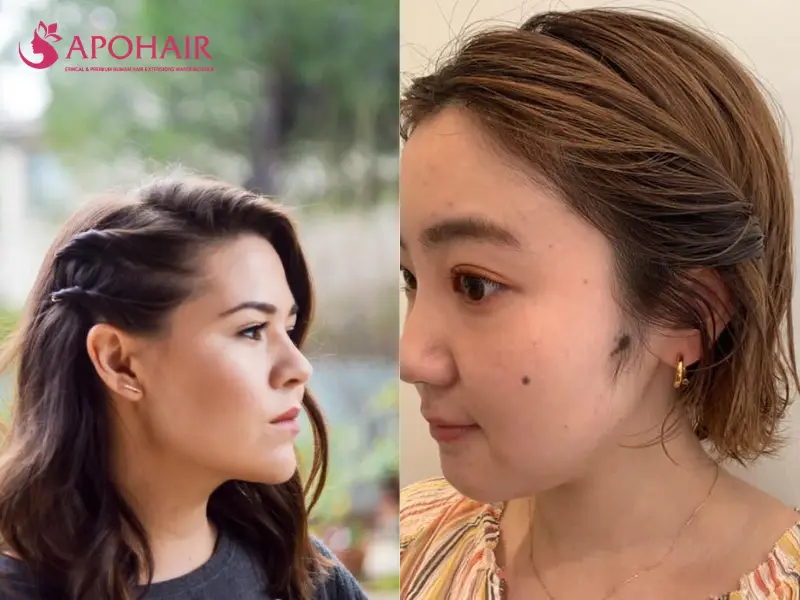
17. Mini Twists at the Temples
Mini twists at the temples take a narrow section above each ear, twist it back along the side of the head, and pin it behind the ear. The twist shortens the section enough that even chin-length front hair reaches an anchor, which a ponytail cannot do. Hair needs about four inches at the temple. Type 3 and Type 4 hair holds these twists with no product, while Type 1 hair needs gel to stop them unwinding. It suits short cuts and bobs.
Each section rolls backward with the fingers rather than braiding, then pins behind the ear with a single pin through the tail. A drop of gel before twisting holds straight hair together. The twist lies along the side of the head rather than lifting away, so it does not catch on clothing. These narrow sections carry almost no weight. A common mistake is twisting a section that is too wide, which makes a rope too thick to lie flat.
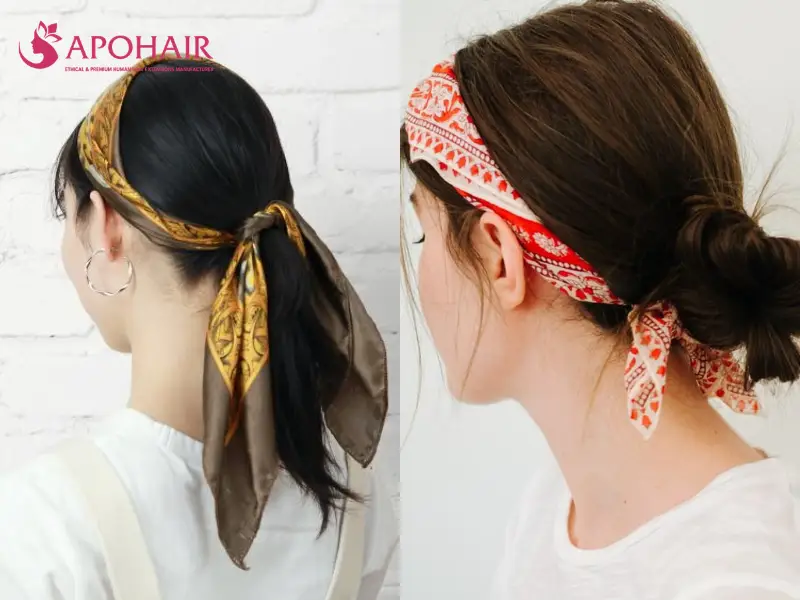
18. Bandana or Scarf Tie
A bandana or scarf tie folds a square of fabric into a band, lays it across the head behind the hairline, and knots underneath at the nape. The fabric holds the entire front section at once, including pieces far too short to pin, which is why it beats every other anchor on very short hair. Any length works, from a pixie to waist length. Satin or silk protects Type 3 and Type 4 hair from friction. It suits cleaning, cooking, and sleep.
The folded band lays across the head with its edge about an inch behind the hairline, then knots at the nape. Cotton grips and stays put, while satin looks smoother but slides unless the knot is firm. A knot placed off to one side sits more comfortably against the skull. Fabric spreads pressure over a wide band rather than a point, so it adds no root tension. A common mistake is tying directly on the hairline, which crushes the shortest strands.
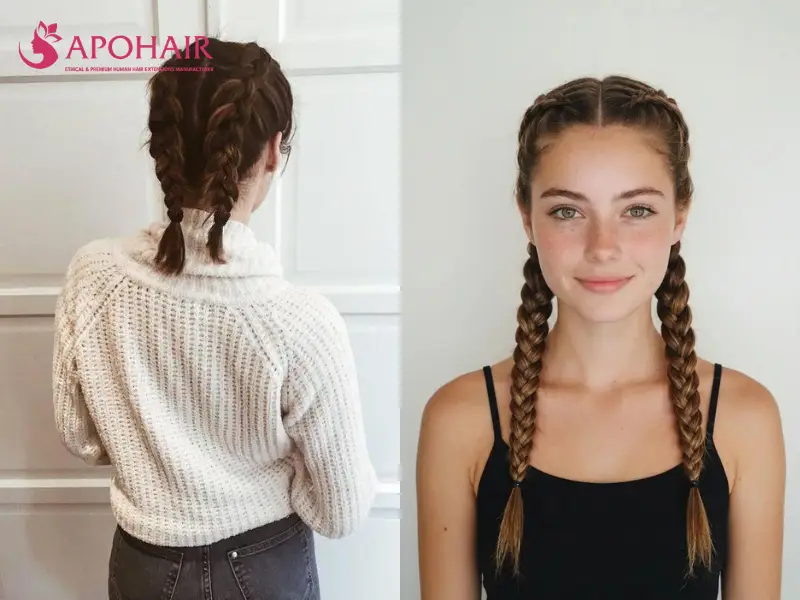
19. Two French Braids on Short Hair
Two French braids on short hair run one braid along each side of a middle part, catching hair from the scalp as they go. A French braid picks up hair at the root, so it holds lengths that could never reach a ponytail, including the short layers that fall around the face. Hair needs about three inches for the first crossings. Type 3 and Type 4 hair braids most securely, while Type 1 hair needs gel. It suits sports, sleep, and multi-day wear.
Each side starts at the front hairline with three small sections and picks up new hair at every crossing, staying close to the scalp so short pieces cannot escape. Small sections matter on short hair, since large ones leave gaps. Braiding down toward the nape follows the head’s curve and stops the braid lifting. Two braids divide the load evenly. A common mistake is braiding tightly at the hairline, which stresses the fragile edge hairs the style protects.
20. Slicked-Back Bob With Gel
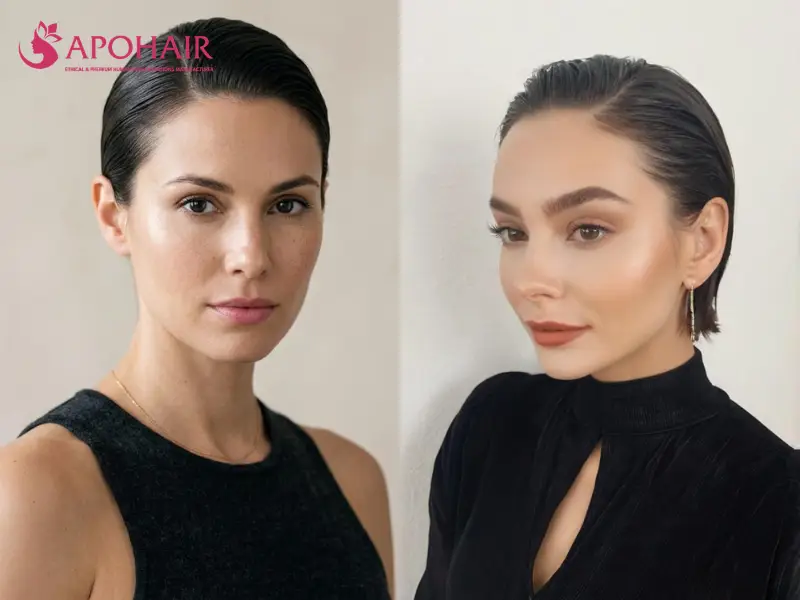
A slicked-back bob combs a chin- or shoulder-length cut straight back from the hairline and sets it with gel, so the whole front stays off the face without hardware. Product alone is the anchor, which suits a length too short to tie and too long to pin comfortably. Bobs from chin length down work best. Type 1 and Type 2 hair sets hardest, while Type 3 and Type 4 hair reads softer and needs stronger gel. It suits evenings and hot weather.
Gel goes through damp hair from the hairline backward with a fine-tooth comb, in thin layers rather than one load. A second pass once the first dries locks any strand that lifted. Gel on dry hair sits on the surface and flakes. Nothing pulls at the roots, though gel dries the lengths, so conditioner follows rather than another gel day. A common mistake is too much product at the crown, which reads wet rather than sleek and flattens the root.
How to Choose a Hairstyle That Keeps Hair Out of Your Face
To choose a hairstyle that keeps hair off the face, work through five decisions: the length available, the task at hand, the hair’s thickness and texture, the hours it must last, and the tension the scalp takes repeatedly. Length rules out most options first, so it decides before anything else does.
- Hair length sets the level of gathering that is possible. Hair past the shoulders reaches any anchor, chin-length hair manages twists and clips, and anything shorter needs pins, fabric, or a braid worked at the scalp.
- The task at hand decides how firmly it must hold. Sleep and exercise need an anchor that survives movement, while a desk day only needs the front pieces cleared.
- Thickness and texture decide what the anchor grips. Type 1 and Type 2 hair slides against bare elastics, so gel does the gripping. Type 3 and Type 4 coils hold a twist unaided but add weight one pin cannot carry.
- Hours of wear separate a quick fix from a set style. A claw clip and a headband release in a second, while braids and pinned twists hold overnight and come out slower.
- Repeat tension decides what is safe to wear daily. The American Academy of Dermatology links tightly pulled styles to traction alopecia, so the anchor point shifts between wears and a sore scalp means the style comes down.
How to Keep Hair Out of Your Face While Sleeping
To keep hair out of the face while sleeping, gather it loosely above the crown or into a soft braid, away from the pillow surface the head presses against for hours. Any hard anchor becomes a pressure point by morning, and any tight tie becomes a breakage line.
- The pineapple. A soft scrunchie collects the hair above the crown into a loose bun, so the length stays off the face while the pillow touches only the scalp. It suits Type 3 and Type 4 hair, which keeps its curl pattern overnight.
- A loose braid. One braid down the back holds long hair in place for hours and releases a soft wave by morning. Braiding to the ends rather than the roots keeps tension off the scalp under body weight.
- Two loose braids. Splitting the hair in half moves the bulk away from the back of the head, which suits anyone who sleeps on their back and finds a single braid uncomfortable.
- A loose low bun in a satin scrunchie. A knot at the nape sits below the pillow contact point for side sleepers. A fabric-covered tie avoids the dent a bare elastic presses in overnight.
- Hair under a satin bonnet. A bonnet holds the whole set loosely and cuts the friction that turns overnight movement into frizz and split ends, which is why it suits coils and any braided style.
Satin or silk on the pillow does the same work for anyone who dislikes wearing something on the head. Metal-hinged clips, hard claw clips, and tight elastics press into the skull once body weight lands on them, so they come out before bed.
Hairstyles to Avoid If You Want Hair Off Your Face
The styles that fail at this job are the ones where the front sections never actually reach an anchor, or where the anchor damages the hair holding it. Each failure is structural rather than a matter of taste, which is why better technique does not rescue them.
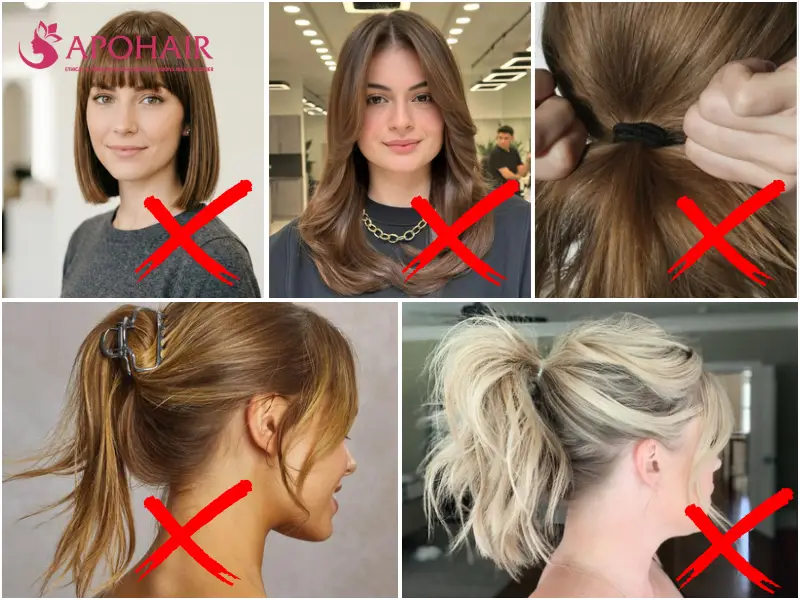
- Blunt bangs cut at eye level. Hair cut to that length has nowhere to go, since it is too short to pin flat and long enough to touch the lashes every time the head moves.
- Short face-framing layers around the cheeks. Layers that stop above the jaw cannot reach a ponytail or a braid, so they drop forward within minutes.
- A tight elastic worn in the same spot daily. The hold works, but the repeated stress at one point thins the hair exactly where it is pulled hardest.
- Metal-toothed clips on fine, product-free hair. The teeth need texture to bite, and on slippery hair they slide down under the weight they hold.
- A high ponytail on hair with heavy layers. Short layers cannot reach the crown anchor, so they escape around the hairline while the rest of the tail holds.
Frequently Asked Questions
How Do You Keep Hair Out of Your Face Without Bangs Growing Out?
Pinning works better than waiting. A fringe folded back on itself and held with two ridged bobby pins clears the eyes at any stage of growth. Mini twists at the temples handle the phase where the fringe reaches the cheekbone. Once it passes the jaw, it joins a half-up section and the awkward stage ends.
What Is the Easiest Way to Keep Hair Out of Your Face at the Gym?
A French braid or two Dutch braids hold best during exercise, because they anchor hair at the scalp along their whole length instead of at one point. Sweat loosens gel and slides clips, but a braid grips regardless. A wide fabric band over the top adds a second line of defence for short front pieces.
How Do You Keep Short Hair Out of Your Face?
Short hair needs an anchor that grips at the root rather than one that gathers length. In order of hold: a braid worked close to the scalp, a fabric band, mini twists pinned behind the ear, then bobby pins at a fold. Gel extends all four, since short strands slip once they dry clean.
Do Headbands Cause Hair Breakage?
Wide, soft bands spread pressure across several inches of scalp and cause little damage. Breakage comes from narrow bands, tight elastic seams, and wearing the same band in the same position every day, which stresses one line of hair repeatedly. Shifting the position and choosing satin-lined versions prevents most of it.
Conclusion
Hairstyles that keep hair out of the face come down to one decision made in order: how much hair needs gathering, then what will anchor it. Length rules out the impossible, the task sets how firmly it must hold, and texture decides whether the anchor grips on its own or needs product. Shifting that anchor point between wears is what keeps a daily habit from costing the hairline.
If you run a salon or supply one, the styles built on braids, twists, and sleek shapes are where added length and density change what is possible. Our team can send samples and factory-direct pricing on straight, wavy, and curly human hair wefts and bulk hair. Because we manufacture 100% Vietnamese Human Hair in our own facility, you can match texture and density to each head rather than working with whatever a distributor has in stock.
